Showing posts with label Side Dish. Show all posts

Wednesday, March 4, 2015

Hudg-Bread

"It's hawt. It is a sensual recreation of a timeless classic, sprinkled with love and care." -Nick Hudgins.
This bread came about as a result of Nick Hudgins, my cousin's boyfriend, needing a job in the kitchen. We threw some basic garlic bread ingredients at him, and he came up with this delicious recipe. The smoked mozzarella is an added bonus (we had leftover from making our Spaghetti and Meatballs) to an already great combination of flavors.

Hudg-Bread
Ingredients:
2 Ciabatta sandwich rolls
1 stick butter (softened)
3 cloves garlic
1 oz. smoked mozzarella
2 T parmesan (grated)
1 T fresh parsley
Salt and pepper

Instructions:

  1. Cut the ciabatta rolls in half lengthwise, then again crosswise, so you have 8 pieces.
  2. Spread 1 tablespoon of the butter onto each piece of bread.
  3. Mince the garlic and parsley, then sprinkle evenly over each piece of bread. 
  4. Salt and pepper the bread, then sprinkle with the parmesan.
  5. Thinly slice the mozzarella and divide evenly between the bread.
  6. Place the bread slices on a cookie sheet, then bake at 350 for 5-10 minutes, or until the cheese is melted and just barely starting to brown. Crank the heat up to 450 and bake for 1-2 minutes more so the bread is golden brown around the edges.
  7. Eat.

Tuesday, February 3, 2015

Salsa Fresca

Salsa Fresca
Ingredients:
2 cups chopped tomatoes
1/3 cup finely chopped yellow onion
2 T finely chopped cilantro
2 T lime juice
1 minced jalapeno pepper (leave the seeds/membrane if you want more heat)
1/4 t salt

Instructions:
  1. Put all ingredients into a bowl and toss well.
  2. Eat.
Source: Whole Foods

Wednesday, January 15, 2014

Scallion Pancakes

So I saved all of my blog posts for when I got back to school, to take up all of the time that I'm just sitting around. I didn't want to spend my whole break on the computer, you see. But now I'm back in Boston, so prepare for a ton of recipes!
Like I said in the Hong Kong Style Chow Mein post, I made the noodles and scallion pancakes for New Year's Eve dinner, along with creme brulee for dessert.
Scallion pancakes are one of my favorite things when I get take out, and they're fun to make as well. If you don't know what scallion pancakes are, they are savory pancakes with chopped up green onions (scallions) in them. They're good with a soy sauce-based dipping sauce.
It took me a couple tries to get these right. Make sure you let the dough sit for enough time, even more than what is specified. Also make sure you are using plenty of oil in the pan when you cook them.
Scallion Pancakes
Makes 2 Pancakes
Ingredients:
1 cup flour (plus more for rolling)
1/2 t kosher salt
1 T shortening
1/4 cup water
2 T milk
1/2 cup scallion rounds (finely sliced, green part only)
1 T vegetable oil (I used sesame oil)

Instructions:
  1. In a bowl, stir together the flour and salt.
  2. Combine water and milk in a small measuring cup. Warm in microwave at full power for one minute. Pour into flour and stir with a fork until the dough comes together. I used my food processor for this, it was a lot easier but you can do either.
  3. Turn the dough out onto a lightly-floured surface and knead for a minute. Divide dough evenly into two pieces. Roll each piece into a ball and let rest, covered by a barely damp paper towel, for at least five minutes.
  4. On a lightly-floured surface, using a generously floured rolling pin, roll out one of the balls into a 9" circle. Using your fingers, smear half of the shortening over the dough circle. Beginning at an edge, roll up the dough into a tight log. Then, from one end of the log, roll up the log into a spiral. Tuck the end under and set aside, covered with the slightly damp paper towel, for at least five minutes. Repeat with the other dough ball.
  5. On a lightly-floured surface, using a generously floured rolling pin, roll out one spiral of dough into a 9" circle again. Sprinkle half of the scallions evenly over the dough. Beginning at an edge, roll up the dough into a tight log. Then, from one end of the log, roll up the log into a spiral. Tuck the end under and set aside, covered with the slightly damp paper towel, for at least five minutes. Repeat with the other dough spiral.
  6. On a lightly-floured surface, using a generously floured rolling pin, roll out one spiral of scallion-filled dough into an 8" circle. Set aside and cover with the damp paper towel. Repeat with the other dough spiral.
  7. Heat half of the oil in a large non-stick skillet over medium to medium-high heat. Carefully lay one pancake in the skillet, and cook until the underside has brown splotches. Flip and cook on the other side until it is also splotchy (make sure there is enough oil in the pan for the second side).
  8. Remove to a plate and cut into triangles. Repeat with other pancake.
  9. Eat.
Scallion Pancake Dipping Sauce
Ingredients:
2 T soy sauce
1 T rice wine vinegar
1 T Chinese rice cooking wine
Pinch grated ginger
Scallion slices

Instructions:
  1. Mix ingredients together in a small bowl.
  2. Serve with scallion pancakes.
  3. Eat.
Source: Food52

Thursday, October 24, 2013

Microwave Rice Cooker Recipes

I'm back, guys. I'm sorry for the hiatus, but I'm back.
What's happened in the 7 months I've been gone? Well, I got a job, which is why I was too busy to post. I'm at college now. I go to Boston University, and I am living in the dorms with no access to a kitchen. However, I am making the best out of this situation.
BU is very picky with which appliances they allow in the dorms: we are not allowed to bring our own microwave, we can only use the microwave that BU rents out. We are not allowed to have any food preparation appliances except for a hot air popcorn popper, which I sadly do not have.
As a picky eater AND a vegetarian, I've grown tired of the dining hall food quickly, even though BU has three really great cafeterias. I've also nearly exhausted my supply of dining points, which you can use to purchase food at several on-campus locations (mainly the food court on campus). I've had to get creative with my limited budget and limited cooking options.
Two of the biggest things that I missed from home were rice and pasta. My family eats rice almost daily, and the rice in the dining halls doesn't even compare. The pasta in the dining halls is ridiculously overcooked and much too soft. So, I did some research, and I found a microwave rice cooker and pasta cooker. They are amazing, and you can make rice and pasta that is almost as good as something you'd make on the stove or in a normal rice cooker.
The rice cooker resembles a normal rice cooker without the electric part... it has holes that allow the steam to escape.
It comes with a handy chart that gives you the proportion of rice to water you should use, as well as the cooking times, for a few different varieties of rice. I've been using white jasmine rice and brown basmati rice and it's worked perfectly. I also made some congee (chinese rice porridge) that turned out pretty well, although the rice cooker overflowed a bit. The whole contraption barely fits into my microwave, but it still has room to rotate on the tray.
The pasta cooker is probably unnecessary... I could probably just get a casserole dish and heat up pasta and water in that, but the pasta cooker came with another chart with cooking times for different pasta shapes and it has lines for the water.
Basically you measure out the number of servings of pasta you want, put it into the container, fill it up with water to the appropriate line, microwave it, and then drain it. It's super easy.
So here are some recipes for your microwave rice cooker, just the basics. Right now I am eating a lot of miso soup with rice, which has been a favorite meal of mine since I was little. The miso soup is just powdered stuff that you add to boiling water. If/when I get fancy with the microwave, I will post recipes. And when I get home, it will be recipe overload, I promise.
If you want to increase the amount of rice you are cooking, just keep the ratio of rice to water the same and increase the cooking time by a few minutes.
Microwave Steamed White Rice
Ingredients:
1 cup white rice
1 1/2 cups water
Pinch of salt

Instructions:
  1. Wash the rice until the water runs clear, it should take 2 or 3 washes.
  2. Combine the rice, the 1 1/2 cups water, and the salt in the microwave rice cooker and snap the lid on.
  3. Microwave for 12 minutes.
  4. Let stand for 5 minutes before serving.
  5. Eat.
Microwave Steamed Brown Rice
Ingredients:
1 cup brown rice
2 1/2 cups water
Pinch of salt

Instructions:
  1. Wash the rice until the water runs clear, it should take 2 or 3 washes.
  2. Combine the rice, the 2 1/2 cups water, and the salt in the microwave rice cooker and snap the lid on.
  3. Microwave for 35 minutes, or until all of the water has been absorbed.
  4. Let stand for 5 minutes before serving.
  5. Eat.
Microwave Congee
Ingredients:
3/4 cup white rice
3 1/2 cups water
Toppings (such as soy sauce, sesame oil, scallions, etc.)

Instructions:
  1. Wash the rice until the water runs clear, it should take 2 or 3 washes.
  2. Combine the rice and 2 cups of the water in the microwave rice cooker and snap the lid on.
  3. Microwave for 15 minutes.
  4. Add another 1 cup of water and stir until combined, then snap the lid back on.
  5. Microwave for another 10 minutes.
  6. Add the remaining 1/2 cup of water and stir until combined, then snap the lid back on.
  7. Microwave for another 10 minutes.
  8. Garnish with toppings as desired.
  9. Eat.

Wednesday, March 20, 2013

Vegetable Risotto

In celebration of the 700th hit on my page, I am making a risotto post. I do not make risotto very much, because, although it is delicious, it is time consuming and takes a bit of effort. Risotto is rice that is cooked slowly with broth until it reaches a creamy consistency. Risotto is one of the go-to dishes for special events in my family. It's very versatile, and can be made with many different ingredients, but to start out, I'm just going to show you a basic recipe.
First, choose your vegetables. I used asparagus and carrots, but you can use anything you'd like. Artichokes would be good, as well as peas. Chop up the vegetables into bite-sized pieces, and then parboil them in salted water for 1-2 minutes, or until tender. Set aside.
Next, bring your vegetable stock to a simmer in a large saucepan. I used my own homemade veggie broth for this, so it was extra special :).
Heat olive oil in a large skillet over medium heat. Add the onion and saute until soft, about 4 minutes.
Next, add the rice and stir until each grain is coated with oil, and is translucent with a white dot in the center.
Add the wine and stir until completely absorbed.
Next, add the simmering broth, one ladleful at a time, to the rice, and stir until absorbed. Repeat, stirring constantly, until all the broth has been used (reserve 1/4 cup to add at the end) and the rice is al dente. This will take about 20 minutes.
Stir in the butter, extra stock, cheese, and vegetables. Season with salt and pepper, and top with more cheese.
Now, serve! It's great on its own, or as a side dish. It also makes really good leftovers. I'll be having a good lunch tomorrow :).

Here's the recipe:
Vegetable Risotto
Ingredients:
1 lb. vegetables (chopped into bite-sized pieces)
7-8 cups vegetable stock
1/4 cup olive oil
1/2 cup yellow onion (finely chopped)
3 cups Arborio or Carnaroli rice
1 cup dry white wine (room temperature)
1 T butter
1/4 cup Parmesan cheese (grated)
Salt and pepper

Instructions:
  1. Parboil the vegetables in salted boiling water until just tender, about 1-2 minutes. Drain and set aside.
  2. In a saucepan over medium heat, bring the stock to a simmer and maintain over low heat.
  3. In a large, heavy skillet, heat the oil over medium heat. Add the onion and saute until softened, about 4 minutes. Add the rice and stir until each grain is coated in oil, and is translucent with a white dot in the center. Add the wine and stir until completely absorbed.
  4. Add the simmering stock, one ladleful at a time, stirring frequently after each addition. Wait until the stock is almost completely absorbed, but the rice is never dry on top, before adding the next ladleful. Reserve 1/4 cup of stock to add at the end.
  5. When the rice is al dente, remove from heat and stir in the extra stock, vegetables, butter, and cheese. Season to taste with salt and pepper.
  6. Eat.
Source: Williams Sonoma

Saturday, March 2, 2013

Singapore Noodles

I went to Singapore last summer while on a trip to Asia with my father. Due to a huge typhoon, our flight from Shanghai to Singapore was cancelled and we were stranded in China for about a day and a half. By the time we finally made it to Singapore, we were only able to spend one day there, and then only one day in Hong Kong after that. We budgeted our time very well and did our best to see as many things as we could while we were there. Here's the skyline of Singapore. I absolutely loved the city; it's extremely clean and had really great food!
We got dinner in a small part of the city called Clarke Quay, which has a lot of shops and restaurants (fun fact: there was a hooters!).  Here I am in Clarke Quay:
We got dinner in a restaurant with traditional Indonesian food, and it was delicious. This dish incorporates a lot of those flavors.
In order to make this dish work, you have to work really fast. Have all of your ingredients prepped beforehand and ready to be cooked. I used a wok, but if you don't have one, a large frying pan will do.
First, soak your noodles according to package directions. Mine soaked in hot water for about 15 minutes. When they are done, drain them and set aside.
Chop up your vegetables--you can use whatever vegetables you like. I used a red bell pepper and a carrot.
Whisk together your sauce ingredients: curry powder, turmeric, paprika, chili flakes, soy sauce, and vinegar. Mix until there are no lumps.
Heat oil in a large wok, and then add ginger and garlic. Stir until golden brown. Next, add half of the sauce and cook for 30 seconds. Add the veggies and tofu. The recipe called for fried tofu, so I just took a block of tofu and cut it up, then pan fried it for a bit until it was browning. Stir the veggies and the tofu with the sauce for about a minute.
Add the noodles and the remaining sauce. Toss well until the sauce mixes with the noodles.
Turn off the heat and add some sesame oil and lemon juice. Mix well.
These noodles were a great side dish to the fish we had for dinner, and a great lunch the next day! It's spicy without being overpowering. I will definitely be making these again :).
Here's the recipe:
Singapore Noodles
Ingredients:
8 oz. rice noodles or vermicelli
1 T vegetable oil
1/2 T garlic (minced)
1/2 T ginger (minced)
1 carrot (diced)
1 red bell pepper (sliced)
1 1/2 cup tofu (fried)
1 T sesame oil
1 t lemon juice
3-4 t curry powder
1 t turmeric
1 t paprika
A few red chili flakes
1/4 cup soy sauce
1 t vinegar

Instructions:

  1. Soak the noodles according to package instructions. Drain well and set aside.
  2. Mix together the curry powder, turmeric, paprika, chili flakes, soy sauce, and vinegar until there are no lumps.
  3. Heat oil in a large wok. Add garlic and ginger and stir until golden brown.
  4. Pour in half of the sauce. Stir for 30 seconds.
  5. Add the vegetables and tofu and stir for one minute. Do not let the vegetables overcook.
  6. Add the noodles and the remaining sauce, and toss until the sauce is well mixed with the noodles.
  7. Turn off the heat and add the sesame oil and lemon juice. Mix well.
  8. Eat.
Source: The Tales of My Cooking

Sunday, February 24, 2013

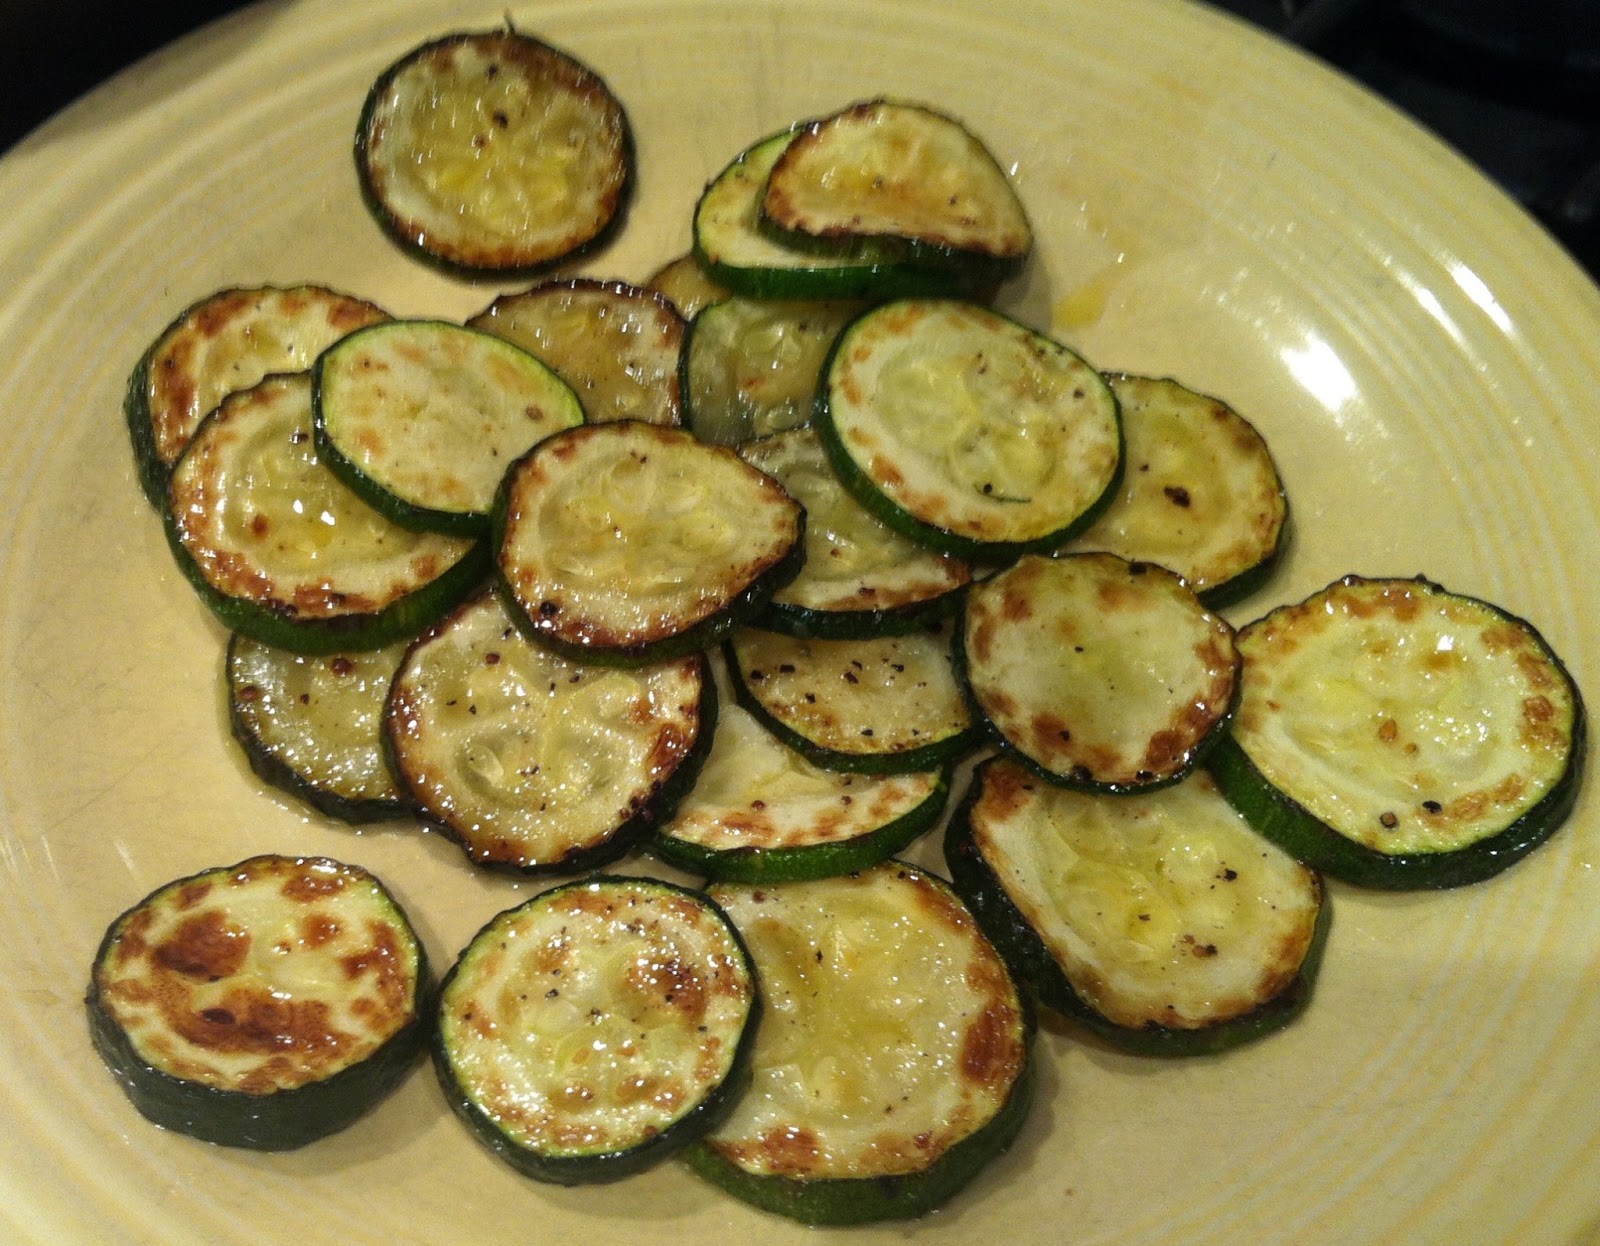
Pan Fried Zucchini with Lemon and Parmesan

I was reading something earlier today about the foods people most often cook wrong, and one of the main ones was vegetables. So many people just boil or steam the heck out of every vegetable they prepare, and end up with a discolored mush. No wonder there are so many kids that hate vegetables! Most vegetables don't need more than a few minutes of steaming, and there are so many other ways of preparing them. One of my favorites is pan frying, especially with zucchini.
I needed a side dish for macaroni and cheese tonight, so I made this. It's simple, but fresh and delicious, and it practically melts in your mouth. It's a snap to prepare, as well, and I was able to make it while my macaroni and cheese was in the oven.
First you cut up your zucchini into 1/4 inch rounds, and then sprinkle with salt and pepper.
Heat some olive oil in a large skillet, and then place the zucchini into the pan in a single layer.
Cook for five minutes on each side, or until nicely browned on each side. Remove from the pan.
Sprinkle with lemon juice and Parmesan cheese, and serve!
Yummy! Make sure to cook in one layer, because otherwise they won't brown properly. I cooked mine in two batches.
Here's the recipe:
Pan Fried Zucchini with Lemon and Parmesan
Ingredients:
4 small zucchini or 2 large zucchini (cut in 1/4 inch rounds)
Salt and pepper
3-4 T olive oil
Juice from 1/2 lemon
2 T Parmesan cheese (grated)

Instructions:
  1. Generously sprinkle both sides of the zucchini slices with salt and pepper. Set aside.
  2. Heat a large skillet over medium choice. When the skillet is hot, add half the olive oil.
  3. Place half of the zucchini in the pan, making sure the slices do not overlap. Cook for 5 minutes or until the bottoms of the slices are nicely browned. Flip the slices over and cook for until the other side is browned. Remove from skillet and repeat with remaining zucchini.
  4. Transfer the cooked zucchini slices to a plate. Sprinkle with lemon juice and Parmesan cheese.
  5. Eat.
Source: Lana's Cooking

Monday, February 18, 2013

Brussels Sprouts with Parmesan

I can understand why some people don't like Brussels sprouts. They have a really strong flavor, which almost has a bit of a horseradish flair. Plus, they're so weird looking! They're like teeny cabbages.
I, on the other hand, love Brussels sprouts. Tonight we had fish again, so I made some Brussels sprouts to go with it. Usually I just roast them for a while in the oven, but when I have a little more time to prep, I make these. They're still really easy to make, and extremely yummy. My family likes to make them to bring to holiday dinner parties.
The original recipe called for toasted pine nuts to go on top, but I had none, so I left them out. The recipe is great with or without them.
First prep your Brussels sprouts by taking off the outer leaves and chopping off the stem. Then, quarter them.
Next, heat up some olive oil in a large frying pan over high heat. Add some garlic and the sprouts and cook until brown and softened.
Next add some vegetable broth and cook until the sprouts are tender.
Remove from the pan and top with some grated Parmesan cheese. Let it melt, and then serve!
I think cooking the Brussels sprouts on the stove takes less time than it does in the oven. They're nice and soft thanks to the veggie broth, instead of being more dried out like they are when they are roasted. However, I like them both ways :).
Here's the recipe:
Brussels Sprouts with Parmesan
Ingredients:
1 T olive oil
2 garlic cloves (minced)
3/4 lb. Brussels sprouts (stemmed and quartered)
1/4 cup vegetable broth
3 T Parmesan cheese (grated)

Instructions:
  1. Heat olive oil in a large frying pan over high heat. Add the garlic and Brussels sprouts and cook until brown and softened, about 8 minutes.
  2. Add broth and cook until sprouts are tender but not soggy, 3-4 minutes.
  3. Transfer to a serving dish and top with the Parmesan.
  4. Eat.
Source: Sunset

Sunday, February 17, 2013

Noodles in Garlic-Ginger Peanut Sauce

Okay, okay, I've found another peanut butter recipe to love. I guess I'm okay with it if it's on noodles.
In this recipe, you can barely even taste the peanut butter. The flavors that really shine through are the garlic and the ginger. This dish, noodles in garlic-ginger peanut sauce, is served cold, and it is a great side dish. The sauce on the noodles is bright and I think would be great on a salad.
I used the noodles I found in my pantry, which were rice sticks (aka vermicelli). Rice sticks are extremely thin rice noodles, often used in Vietnamese or Filipino food. You could also use Chinese wheat or egg noodles if you wanted.
First boil water and cook your noodles until a little softer than al dente. Drain, rinse, and then drain again.
Next mix the remaining ingredients together in a small bowl until smooth.
When ready to serve, pour the sauce over the noodles and toss to combine.
Yummy! I love these noodles. They are super easy and delicious. I think they'd be good if I added some carrots and cucumber to bulk it up.
Here's the recipe:
Noodles in Garlic-Ginger Peanut Sauce
Ingredients:
1/2 pound Chinese wheat or egg noodles, or vermicelli
1/4 cup creamy peanut butter
1/4 cup cider vinegar
1 T soy sauce
2 t sesame oil
3 T brown sugar
1 T ginger (peeled and minced)
1 t garlic (minced)
2 T scallions (thinly sliced, green part only)

Instructions:
  1. In a pot of boiling water, cook the noodles until a little softer than al dente. Drain, rinse with cold water, and then set aside to drain again.
  2. In a small bowl, combine the remaining ingredients. Stir until smooth.
  3. When ready to serve, pour the sauce over the noodles and toss to combine.
  4. Eat.
Source: Easy Asian Noodles

Sunday, February 10, 2013

Japanese Cucumber Salad

As I said in my previous post, tonight is Asian food night, and we are having salmon with a few side dishes. The first is mahogany noodles, and the second is Japanese cucumber salad.
Cucumbers are delicious and refreshing. I will snack on them alone, or drizzle them with a little soy sauce and vinegar. They are also really healthy, so if you are looking for a yummy snack, this is the way to go!
First you slice your cucumbers really thinly. Toss them with some salt. This draws out the extra water in them.
Then whisk together rice vinegar, soy sauce, sesame oil, sugar, and sesame seeds until the sugar dissolves.
Finally, drain the extra water from the cucumbers, and then toss them with the sauce.
It was very refreshing :). I made half a recipe because I only had one cucumber, and it was great as a side dish for my family, but I would have been happy with the whole recipe! The sauce was not too sweet, but not too salty either. This is a really quick salad that you can make with just a few ingredients. I will definitely be making this again :).
Here's the recipe:
Japanese Cucumber Salad
Ingredients:
2 large cucumbers
1/2 T salt
1/2 cup white rice vinegar
2 T soy sauce
2 t sesame oil
2 T sugar
1/2 t sesame seeds

Instructions:

  1. Cut the cucumbers into paper-thin slices. In a large bowl, toss the cucumber slices with the salt and let sit for 5-10 minutes.
  2. In a small bowl, stir together the vinegar, soy sauce, sesame oil, sugar, and sesame seeds until the sugar is dissolved.
  3. Drain the cucumber slices in a colander and gently squeeze them with your hands to squeeze out excess water. Return the slices to a large bowl and toss with the soy sauce mixture. Transfer the cucumbers to a serving dish.
  4. Eat.
Source: Appetite for China

Mahogany Noodles

The rest of my family decided to have some salmon tonight, so I was in charge of side dishes. We usually cook the salmon with some teriyaki sauce or some other japanese sauce, so I decided to make side dishes with an Asian influence.
I've had a cookbook for Asian noodles for a long time, but I had never used it until tonight. Many of the dishes had meat in them, and the ones that didn't had long, intimidating lists of ingredients. However, yesterday I was looking through it again, and realized that I already had all of the ingredients for many of the recipes. They were all relatively simple, too.
I chose to make the first vegetarian recipe in the book: mahogany noodles. It can be served hot or cold. You can also adjust the spiciness of the dish by adding more or less chili-garlic sauce (I used Sriracha). The recipe is very easy and quick to prepare.
First, boil your noodles in a large pot until they are a little softer than al dente, and then drain them. In a small mixing bowl, whisk together some soy sauce, vinegar, cooking wine, sesame oil, chili-garlic sauce, sugar, and pepper.
 Mince your ginger and garlic, then stir fry with some oil over medium-high heat until they sizzle.
 Add the noodles and the soy sauce mixture and stir until the noodles are heated through and evenly colored. Add the scallions and stir until mixed in.
Yummy! The dish has a really good flavor from the soy sauce and sesame oil. I will definitely be trying more recipes from this cookbook.
Here's the recipe:
Mahogany Noodles
Ingredients:
6 oz. Chinese egg or wheat noodles or vermicelli or thin spaghetti
2 T soy sauce
1 T cider vinegar
1 t cooking wine
1 t sesame oil
1 t chili-garlic sauce (or more to taste)
1 T sugar
1 t ground black pepper
1 T vegetable oil
1 1/2 t fresh ginger (peeled and minced)
1 t garlic (minced)
2 scallions (chopped)

Instructions:
  1. In a large pot of boiling water, cook the noodles until a little softer than al dente. Drain, rinse in cold water and set aside to drain again.
  2. In a small mixing bowl, whisk together the soy sauce, vinegar, wine, sesame oil, chili-garlic sauce, sugar, and pepper.
  3. In a pan, heat the oil over medium-high heat. Add the ginger and garlic and stir until the oil is hot and the garlic and ginger sizzle; do not allow the garlic to burn. Add the noodles to the pan and pour the soy sauce mixture over the noodles. Cook, stirring constantly, until the noodles are heated through and evenly colored. Add the scallions and stir until well incorporated, about 30 seconds.
  4. Eat.
Source: Easy Asian Noodles

Friday, February 1, 2013

Oven Fried Zucchini Sticks

Tonight for dinner I made these zucchinis sticks, which are just like the fried version, but soooo much healthier. They're really yummy :). The recipe is quite simple, as well. It takes a little while to prepare, but totally worth it. They're crunchy and delicious and go very well with some honey mustard.
Basically, cut up your zucchini into thin sticks.

Put them first in flour, then egg, then breadcrumbs.
Then put them onto a greased baking sheet.
Spray again with cooking spray and bake for 30-35 minutes.
Serve with some sauce (I suggest honey mustard). It made about 60 sticks, so this would be good party food, or just good as an appetizer. My mom and I ate most of them tonight.
Here's the recipe:
Oven Fried Zucchini Sticks
Ingredients:
Cooking spray
3 zucchini
1/2 cup flour
Salt and pepper
2 1/2 cups breadcrumbs
2 eggs
2 T water

Instructions:
  1. Coat a baking sheet with cooking spray or oil.
  2. Wash the zucchini and trim the ends. Cut the zucchini in half lengthwise and then crosswise, and then cut the quarters into 1/4-inch-thick-sticks.
  3. Season the flour with salt and pepper and put that into a shallow bowl. Mix the two eggs with the water and put it into another shallow bowl. Put the breadcrumbs into a last bowl.
  4. First coat the zucchini sticks with flour, then dip in egg, then breadcrumbs. Arrange on the baking sheet.
  5. Generously spray the zucchini with cooking spray and bake for 30-35 minutes at 400 degrees F, or until golden brown.
  6. Eat.
Source: College Vegetarian Cooking