Wednesday, February 6, 2013

Chocolate Crinkle Cookies

Today, around lunchtime, I started craving chocolate chip cookies. Particularly a warm one, fresh out of the oven. I made all my friends hungry by talking about it. I asked my dad to pick up some m&ms on his way home, so that I could make some m&m cookies (I am currently out of chocolate chips). However, when he got home, there were only enough to fill half a cup.
No worries, I found something else.
Before today, I had never had chocolate crinkle cookies. When I was little, I did not like powdered sugar, so I always steered clear of any dessert that had powdered sugar on top. As a result, I missed out on a lot of great cookies and bars. I've gotten over my hate of powdered sugar, and have been trying to catch up on everything I missed. At Christmas, my grandma made Russian tea cakes, which are shortbread balls covered in powdered sugar. I had never had those before either, and they are fantastic.
Chocolate crinkle cookies have a distinct look: they puff up and crackle as they bake, so the dark brown cracks contrast with the powdered sugar exterior. I think they are the prettiest cookies I've ever made, and easily some of the most delicious.
First you mix the dry ingredients in one bowl.
Then you beat the butter and sugar together (I used my hand mixer)
Add two eggs and some vanilla.
Add the flour mixture, and beat until just blended.
Make rounded balls of dough and drop into the powdered sugar.
Roll the ball in the powdered sugar until covered, and then place the balls on a greased baking sheet. I had to use some nonstick cake pans because they are the only pans that fit in my mini oven. My regular oven is broken.
Bake the cookies until they are crackled and puffed. Remove and cool the pan on a rack for 15 minutes.
They are so pretty. Eek. I love the contrast of the dark brown and white. And they taste like brownies :).
My brother and my dad ate about 10 of them. Yummmm.
By the way, I got a new apron this weekend! My friends and I went to go see Wicked in SF, and they were selling these aprons:

I love it :). It satisfies my love of cooking AND my love of theatre! Now if only there were a horse on it... :).
Here's the recipe:
Chocolate Crinkle Cookies
Ingredients:
1/2 cup confectioners' sugar
1 2/3 cups all-purpose flour
1/2 cup unsweetened cocoa powder
1 1/2 teaspoons baking powder
1/4 teaspoon salt
1 stick unsalted butter (room temperature)
1 1/4 cup sugar
2 eggs
1/2 teaspoon vanilla extract

Instructions:
  1. Grease 2 baking sheets and set aside.
  2. Put the confectioners' sugar into a bowl and set aside.
  3. In another bowl, stir together the flour, cocoa powder, baking powder, and salt. Set aside.
  4. In a large bowl, using an electric mixer, beat the butter and sugar until creamy. Add the eggs and the vanilla and beat again until blended.
  5. Add the flour mixture, and beat on low speed until just combined.
  6. Using a tablespoon, scoop up a rounded spoonful of dough and roll it into a ball. Roll the ball in confectioners' sugar until coated, then place onto a greased cookie sheet. Repeat with remaining dough. The cookies should be about 2 inches apart.
  7. Put a baking sheet in the oven and bake the cookies at 350 degrees F until they are crackled and puffed, 10-12 minutes. Remove the baking sheet from the oven and cool it on a wire rack for 15 minutes. Repeat with remaining baking sheet.
  8. Eat.
Source: Williams Sonoma

Black Bean and Corn Soft Tacos

Taco night at my house is absolutely the best. Usually we heat up some beans (black or refried), warm up some tortillas, and then just get a bunch of toppings and put them into bowls for everyone to serve themselves. It's always delicious, and it's never the same. Sometimes we have fish or shrimp tacos (until I got sick from some shrimp and I don't eat them anymore), or sometimes I'll make some tortillas from scratch (another recipe to post!).
Now, I changed the recipe I found quite a bit. I added a few more things, and I think that additional toppings would go well with this (tomatoes, salsa, some lime wedges, etc.). However, the tacos were still quite good. The original recipe calls for a sour cream sauce with some hot green chiles, but no one in my family likes chiles, so I didn't bother. I just used some sour cream with a bit of lime juice mixed in.
The tacos are really easy to make. Just drain the beans, rinse, and place in a small sauce pan. Add the corn and its liquid, some chili powder, and some cumin. I also added the juice from half of a lime and some salt and pepper. Stir everything together.
Cook over medium-low heat, stirring occasionally, for about 10 minutes, then remove from heat and put into a bowl. Put the shredded lettuce, grated Cheddar cheese, and sour cream sauce in bowls for serving. Heat up your tortillas in the oven or the microwave, and then put onto a plate. Allow everyone to make their own tacos. Here's mine:
The beans and corn taste a little bit like something you might get at taco bell, but so much better. At some point I'd like to try the recipe again with some tomatoes and homemade tortillas, but it's already really great. I have some extra bean/corn mixture, so I'll probably put it into a quesadilla or something. Yum :)
Here's the recipe:
Black Bean and Corn Soft Tacos
Ingredients:
1/2 cup sour cream
2 15 oz. cans black beans
1 15 oz. can corn kernels
1 1/2 T chili powder
1 T cumin
Juice from 1/2 lime
Salt and pepper
8 8-inch flour or corn tortillas
1 1/2 cups shredded lettuce
1 cup grated Cheddar cheese

Instructions
  1. Put the sour cream, Cheddar cheese, and lettuce into separate serving bowls. Set aside.
  2. Drain the beans, rinse under cold water, and place in a small saucepan. Add the corn and its liquid, the chili powder, the cumin, the lime juice, and some salt and pepper to taste. Stir until combined, and then cook over medium-low heat for 8-10 minutes, stirring occasionally. Transfer to a serving bowl.
  3. Heat up the tortillas in the oven or the microwave, and then put onto a plate.
  4. Serve everything together and allow people to build their own tacos with the toppings.
  5. Eat.
Source: College Vegetarian Cooking

Fettuccine with Asparagus and Lemon

So a few years ago, my mom bought me this book: Teens Cook Baking. It was written by two sisters, and it is full of tons of delicious recipes. I loved it so much that my mom got me another book by the same authors: College Vegetarian Cooking. It is fantastic. It's got tons of recipes that are delicious, but made with cheap and easy-to-get ingredients: perfect for the broke college student. When I go to college next year, this is definitely coming with me. A few weeks ago, I made recipes from this book for dinner for a week straight, and they were all delicious. The best part was that even my carnivore brother and dad liked everything I made (and only supplemented the meals with meat a few times!).
One of the recipes that I discovered during that week was this one: fettuccine with asparagus and lemon. It's super easy and only has a few ingredients, but it's really yummy. It's a bit like fettuccine alfredo, but much lighter and healthier. You can prepare the sauce during the time it takes to cook the pasta, so it's great when you don't have a lot of time to cook.
Basically, you boil a big pot of salted water for your pasta. Follow the directions on the box and drain when the pasta is al dente.
Meanwhile, wash and prep your asparagus, then cut it into 1" pieces and boil in a saucepan with 1/2" of water until it is barely tender, then drain it and set aside.
Grate 1 T of the lemon peel, and squeeze 2 T of juice from the lemon.
Whisk together the egg and milk in a large sauce pan. Cook over medium until very warm, but do not let it boil.
Remove from heat and stir in the Parmesan cheese, apsaragus, and lemon zest and juice. 
Add the fettuccine and toss until completely coated. Make sure to drain the noodles and asparagus extremely well, so that the sauce doesn't get watered down too much. Season with salt and pepper and top with more Parmesan and then serve. 
The leftovers are great cold. I brought some to school for lunch and it was great :). 
Here's the recipe:
Fettuccine with Asparagus and Lemon
Ingredients:
1 lb. uncooked fettuccine
1 lb. asparagus
1 lemon
1 egg
1 cup milk
1/4 cup grated Parmesan cheese (plus extra for sprinkling)
Salt and pepper

Instructions:
  1. Cook the fettuccine according to package instructions. Drain and set aside.
  2. Meanwhile, break the tough ends off the asparagus and discard (see veggie broth). Cut the asparagus into 1 inch pieces. Place in a saucepan with about 1/2 inch of water, and bring to a boil. Cover and cook over medium-low heat for 3-4 minutes, or until barely tender. Drain and set aside.
  3. Finely grate 1 T of the lemon peel. Squeeze 2 T of the juice from the lemon.
  4. Whisk together the egg and milk in a large saucepan. Cook over medium heat for 4-5 minutes, or until very warm. Do not let it boil.
  5. Remove from the heat, add the Parmesan cheese, asparagus, lemon zest, and lemon juice, and stir until combined. Add the fettuccine and toss until completely coated (make sure asparagus and fettuccine are well drained, so the sauce does not get watered down).
  6. Season with salt and pepper and top with more Parmesan cheese.
  7. Eat.
Source: College Vegetarian Cooking

Crepes

Hello!
So, I haven't written in a few days because the weekend was busy and I also got sick, but I'm back!
On Sunday I woke up with a craving for crepes, so I spent my entire morning making them. Crepes, if you didn't already know, are extremely thin French pancakes, which are then filled with whatever you want. I'm a fan of simply putting a little cinnamon and sugar inside, then folding it up, but I also like melted chocolate and strawberries.
Crepes can also be made savory. For lunch on Sunday I took one of my savory crepes and put some melted cheese and chopped up artichoke hearts and sun dried tomatoes in it. It was delicious :).
Crepes are a little tricky to get the hang of at first, and to be honest, I'm still not that great at making them. But practice makes perfect, and I am happy to eat any slighty-less-than perfect ones.
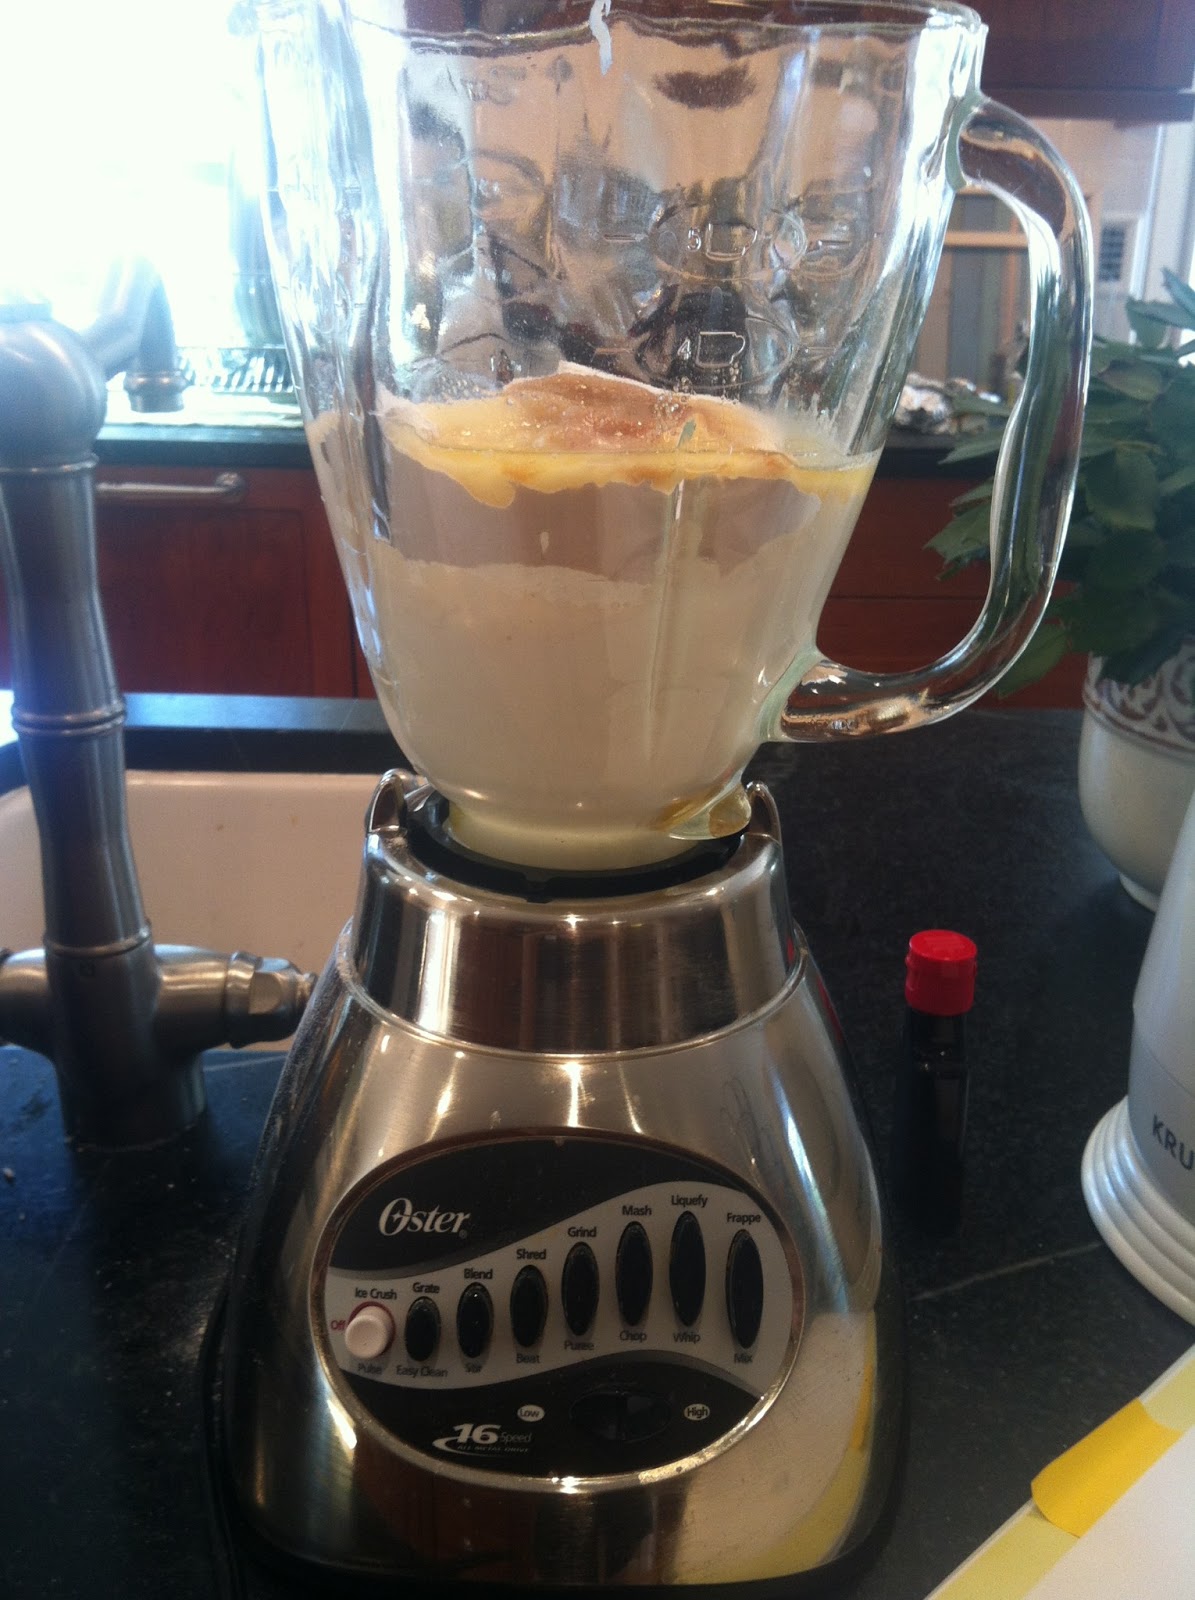
The batter is quite simple. Put all of your ingredients into a blender or food processor, and blend until combined.
 Let the batter chill for a while (I just put the top of the blender in the fridge). Then, take a small skillet and melt a few teaspoons of butter in it over medium-high heat. Working quickly, pour 2-3 T of the batter into the skillet and tilt the pan so the batter spreads out. When the crepe is dry on the edges and set in the middle, use your fingers and a spatula to flip it over.
Let it cook for another few seconds, and then take it off. Repeat with the remaining batter. Then fill crepes with whatever you want and enjoy :).
Surprise! You can stack them up and freeze them if you want. Just let cool, and then put them in a freezer bag, squish out all of the air, and then freeze. Then take out however many you want, whenever you want. Yum :).
Here's my cinnamon sugar crepe. My friend's mom used to make these for us whenever I slept over at her house, except she always put whipped cream on top. Mine looks a little boring without it (but it was still delicous!)
Here are the recipes:
Dessert Crepes
Ingredients:
2 large eggs
1 cup milk
1/3 cup water
1 cup all-purpose flour
2 T sugar
1 t vanilla extract
1 T rum, amaretto, brandy, or other liqueur (optional)
2 T butter (melted)

Instructions:
  1. In a blender of food processor, blend all ingredients together for 5 seconds, or until smooth. Scrape down the sides and repeat, if necessary. (You can also mix by hand if desired)
  2. Cover and refrigerate for at least 1 hour (2 hours is preferable) or up to 24 hours.
  3. Heat a nonstick pan over medium-high heat until hot. Wipe the pan lightly with butter, life the pan from the heat, and pour in 2-3 T of batter, tilting and rotating the pan to coat the surface.
  4. Cook until almost dry on top and lightly browned on the edges, about 1 minute.
  5. Loosen the edges with a spatula  and flip the crepe over using your fingers or the spatula, then cook the other side for about 15 seconds, or until lightly browned.
  6. Turn the crepe out onto a plate to cool. Repeat with the remaining batter, wiping the pan with butter as needed and stacking the crepes as they are cooked.
  7. Fill and eat.
Savory Crepes
Ingredients:
2 large eggs
1 cup milk
1/3 cup water
1 cup all-purpose flour
1/4 t salt
2 T butter (melted)

Instructions: same as above.
Source: Crepes

Friday, February 1, 2013

Veggie Broth

So for the past month or so, I've been saving up trimmings and leftover vegetables from all of my recipes. I've been keeping them in tupperware containers in the freezer. There were carrot peelings, onion skins and tops, the tiny garlic cloves that have no use, and a bunch of other stuff. Anyway, I saved all of this stuff so I could make some vegetable stock without wasting any vegetables.
I waited until I had saved about 10 cups of frozen odds and ends. Then, I put them in a large stock pot and added just enough water to cover them. I also added some dried herbs (thyme, basil, and dill), a few bay leaves, and some peppercorns.
Then, I brought it to a boil. Once it boiled, I reduced the heat to medium and let it simmer, uncovered, for an hour. Then I drained it into another pot with a colander.
 Here's the strained vegetables.
I put the broth into a bunch of jars, and then put the leftover into some ice cube trays so I can have small servings available all the time. It made about 8 cups of broth, plus the ice cubes.

So this wasn't really a meal or anything, but it's really good and I use veggie broth a lot so it is nice to have on hand. And it was really nice to not waste those little bits of veggies that no one ever uses, and instead make something out of them :).
So yeah, that's it for tonight. Enjoy :)

Oven Fried Zucchini Sticks

Tonight for dinner I made these zucchinis sticks, which are just like the fried version, but soooo much healthier. They're really yummy :). The recipe is quite simple, as well. It takes a little while to prepare, but totally worth it. They're crunchy and delicious and go very well with some honey mustard.
Basically, cut up your zucchini into thin sticks.

Put them first in flour, then egg, then breadcrumbs.
Then put them onto a greased baking sheet.
Spray again with cooking spray and bake for 30-35 minutes.
Serve with some sauce (I suggest honey mustard). It made about 60 sticks, so this would be good party food, or just good as an appetizer. My mom and I ate most of them tonight.
Here's the recipe:
Oven Fried Zucchini Sticks
Ingredients:
Cooking spray
3 zucchini
1/2 cup flour
Salt and pepper
2 1/2 cups breadcrumbs
2 eggs
2 T water

Instructions:
  1. Coat a baking sheet with cooking spray or oil.
  2. Wash the zucchini and trim the ends. Cut the zucchini in half lengthwise and then crosswise, and then cut the quarters into 1/4-inch-thick-sticks.
  3. Season the flour with salt and pepper and put that into a shallow bowl. Mix the two eggs with the water and put it into another shallow bowl. Put the breadcrumbs into a last bowl.
  4. First coat the zucchini sticks with flour, then dip in egg, then breadcrumbs. Arrange on the baking sheet.
  5. Generously spray the zucchini with cooking spray and bake for 30-35 minutes at 400 degrees F, or until golden brown.
  6. Eat.
Source: College Vegetarian Cooking

Garlic Focaccia

Bread is the best. I will eat it for dinner. Especially when it's fresh out of the oven. And, with my breadmaker, that is extremely easy. Just put all the ingredients in according to the manufacturer's instructions, select a cycle, and BAM. Bread.
So one of my favorite things to make in my breadmaker is focaccia. Focaccia is almost like a pizza without sauce. You can put whatever toppings you want on it, or just leave it alone. What makes it delicious is the olive oil you put in it. Note: this is not a bread for people on diets.
So basically, throw all of your ingredients in the bread machine and set it to the basic dough cycle. Then let it do its thing (takes about an hour and forty five minutes).
Mix up some olive oil and garlic to put on top.
Put the dough on a baking sheet with the oil, press your fingers all the way through the dough to make holes, and then let it rise for a second time. Sprinkle with some salt, and then bake.
Bam. It's delicious. It's crunchy on the outside and soft in the center, and you don't need to dip it in anything because it already has so much olive oil in it. Yummy. (I apologize for the poor quality picture, I was taking pictures with my phone).
Here's the recipe:
Garlic Focaccia
Ingredients:
1 3/4 cups warm water
1 package (or 2 1/4 t.) active dry yeast
1 T sugar
5 cups all purpose flour
1 T kosher salt (plus extra for sprinkling)
1 cup olive oil
6 garlic cloves (minced)

Instructions:
  1. Combine the water, yeast, sugar, flour, salt, 1/2 cup of the olive oil, and 3 of the garlic cloves in your bread machine according to the manufacturer's instructions. Set it for the basic dough cycle and press start.
  2. Meanwhile, combine the remaining 1/2 cup olive oil with the remaining 3 garlic cloves.
  3. Grease a baking sheet with half of the olive oil mixture.
  4. When the dough cycle is over, take the dough out and put it on the baking sheet. Flatten it with your palms until it fits the sheet. Press your fingers through the dough to make the characteristic holes all over the bread. 
  5. Brush the dough with the remaining olive oil mixture.
  6. Let the dough rise in a warm place for another 45 minutes.
  7. Sprinkle the dough with kosher salt, and then bake at 425 degrees F for 25-30 minutes, or until golden brown.
  8. Eat.
Source: Food Network, Anne Burell